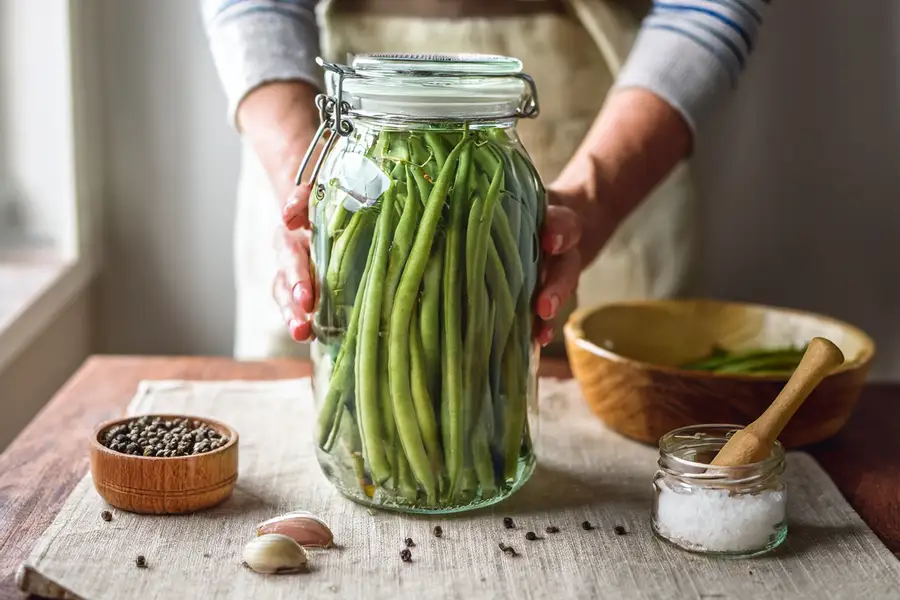
Fermented green beans are crisp, savoury, and wonderfully practical. Unlike softer summer vegetables, green beans hold their shape well in brine, making them a satisfying ferment for snacking, salads, sandwiches, mezze plates, and summer meals.
This recipe keeps the flavour classic: fresh green beans, garlic, dill, and a simple salt brine. The result is clean, tangy, aromatic, and easy to use straight from the fridge.
Green beans are best fermented while very fresh. Choose firm, bright pods without soft spots, trim the ends, and pack them upright in the jar so they stay neat and easy to serve.
Why you’ll love this ferment
Green beans stay pleasantly crisp during fermentation, especially when they are fresh and not over-fermented. Garlic gives the brine depth, while dill adds a familiar pickle-like aroma.
This is a good beginner-friendly summer ferment because the beans are easy to pack, easy to keep submerged, and useful in many meals.
FAQs
Do green beans stay crisp when fermented?
Yes, green beans can stay pleasantly crisp if they are very fresh, packed whole, kept submerged, and moved to the fridge once tangy. Over-fermentation or very warm conditions can soften them.
Can I use frozen green beans?
Fresh green beans are best for this recipe. Frozen beans are usually softer after thawing and may not hold their texture well during fermentation.
Why did the colour of my green beans change?
Green beans often become less bright and more olive-green during fermentation. This is normal. The ferment should still smell fresh, salty, garlicky, and pleasantly sour.
Fermented Green Beans with Garlic and Dill
Ingredients:
For 1 litre jar:
- 450–500 g fresh green beans
- 2 garlic cloves, peeled and lightly crushed
- 2 fresh dill sprigs, or 1 tsp dill seeds
- ½ tsp black peppercorns, optional
- 500 ml water
- 15 g fine sea salt or pickling salt
Brine Ratio
This recipe uses a 3% brine:
Directions:
- Wash the green beans well and trim the stem ends.
- Place the garlic, dill, and black peppercorns in the bottom of a clean 1 litre jar.
- Pack the green beans upright into the jar. Trim a little more if needed so they sit below the shoulder of the jar.
- Dissolve the salt fully in the water to make the brine.
- Pour the brine over the beans until they are fully covered.
- Use a fermentation weight or suitable clean food-safe weight to keep the beans below the brine.
- Close the jar loosely, or use a fermentation lid. Place the jar on a small plate in case any brine bubbles over.
- Ferment at room temperature for 4–7 days. In a warm kitchen, taste after 4 days.
- When the beans taste tangy, garlicky, and still crisp, transfer the jar to the fridge.
What to Expect
The brine may turn cloudy and small bubbles may appear. The beans may lose some of their bright green colour and become more olive-toned.
The finished ferment should smell fresh, salty, garlicky, dill-scented, and pleasantly sour. Discard it if you see mould, sliminess, unpleasant odours, or signs of spoilage.
Fermentation Time
4–7 days at room temperature.
Warmer kitchens may need less time. Cooler kitchens may need longer.
Notes:
Storage
Store in the fridge and use within 1–2 months for best texture.
Always use clean utensils and keep the beans covered by brine.
Serving Ideas
Serve as a crisp snack with cheese, olives, dips, or flatbread.
Chop into potato salad, grain bowls, lentil salads, or tuna-style salads.
Serve alongside sandwiches, toasties, eggs, roasted vegetables, or mezze plates.
Use the brine sparingly in dressings where a salty, garlicky note would be welcome.