

Sour cream is a versatile and delicious accompaniment that can enhance the flavor of many dishes, from tacos to baked potatoes. With a rich, creamy texture and a slight tang, it’s a staple in many households. However, store-bought sour cream often includes additives and preservatives that can alter its natural taste and texture. The solution? Make your own sour cream at home using live culture, ensuring a fresh and authentic flavor every time.
Creating sour cream at home is an engaging process that allows you to choose exactly the ingredients you prefer, resulting in a product tailored precisely to your taste. By using live cultures, not only do you ensure a dynamic and traditional method of fermentation, but you also benefit from a potentially more complex flavor profile. This guide will walk you through the steps of making high-quality sour cream in your very own kitchen.
Ingredients and instructions
Gathering your ingredients is the first step. You’ll need heavy cream and a starter culture. Opt for heavy cream with a fat content of at least 35%, often labeled as “heavy cream” or “heavy whipping cream”. Cream labeled as “ultra pasteurized” should be avoided, as the high heat used in its process alters the proteins and fats, making it unsuitable for culturing. Additionally, stay away from half-and-half due to its lower fat content and resulting inability to thicken properly.
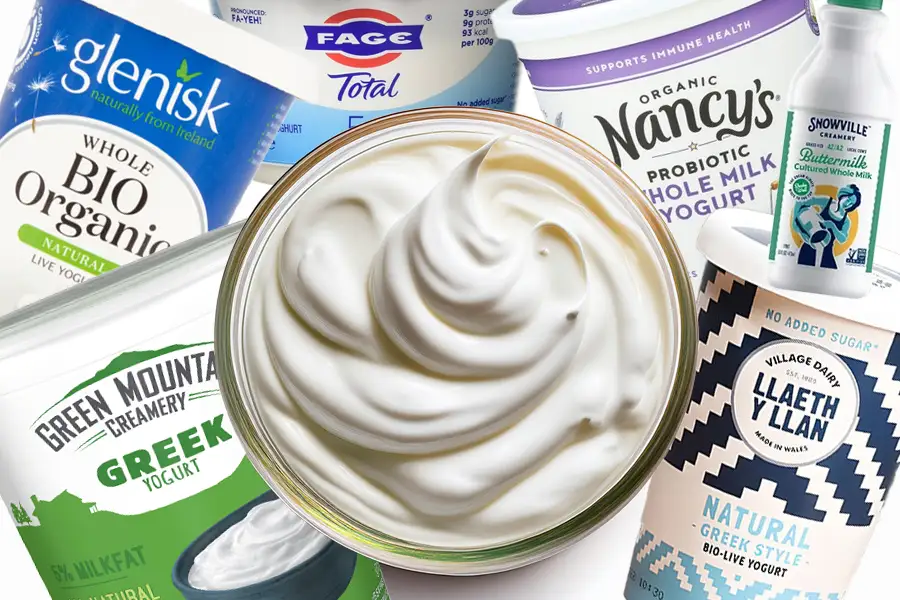
For the starter culture, select a plain yogurt containing live and active cultures; brands like Fage’s Greek yogurt are a solid choice. You may also experiment with using other cultured products like buttermilk or ariani. Bear in mind that different starters can subtly alter the flavor of your sour cream, so feel free to try small batches with various starters to discern your preferred taste.
Before beginning, allow both your cream and chosen starter to sit at room temperature for about two hours. This step is crucial as it gives the live cultures an ideal environment to thrive, catalyzing the fermentation process. Once ready, place the cream in a clean container and mix in a tablespoon of your chosen live culture. Cover the container loosely with a cheesecloth, towel, or lid placed ajar to allow the mixture to breathe during fermentation.
The fermentation process
Leave the mixture to ferment at room temperature for approximately 24 hours. During this time, the live cultures work diligently to thicken the cream and develop its distinct tangy flavor. It’s important to monitor the thickness of the cream, as fermentation speed can vary with the ambient temperature. Warmer environments will speed up the process, potentially finishing in as little as 12 hours. If the later happens and you want to slow it down put it in the refrigerator.
Check for the desired consistency before moving the sour cream to the refrigerator, ensuring it’s at least as thick as yogurt. Once placed in the fridge, the sour cream will continue to thicken over a few days. Be observant for any signs of yeast contamination, such as bubbles forming in the cream. Bubble formation indicates the possible presence of yeast, which can alter the taste and affect the sour cream’s safety.
Troubleshooting and tips
Certain challenges may arise when fermenting sour cream at home. For instance, if the sour cream becomes yeasty, it is often due to over-fermentation. This occurs when the bacterial cultures deplete, allowing yeast to take hold. Prevent this by using fresh cream, keeping wild yeasts away, and choosing a robust starter culture. Additionally, ensure that your sour cream shows no bubbles, as these indicate potential over-fermentation.
Runny sour cream is another common issue, typically resolved by using cream with a higher fat content and placing the mixture in a warmer part of your kitchen. If the sour cream remains runny after the initial fermentation period, allow it to sit for several more hours. However, remember that refrigeration will aid in further thickening, but it shouldn’t be relied upon solely to achieve the correct texture.
The science part
The science behind sour cream production involves live bacteria converting lactose, the sugar present in cream, into lactic acid. This conversion reduces the pH, causing the proteins to coagulate and thicken the cream while imparting the sour taste characteristic of this dairy product. The process is similar to how yogurt is made, utilizing beneficial bacterial cultures to create a flavorful and rich product.
Using homemade cultured sour cream is not only a rewarding kitchen experiment but also an opportunity to consume fewer additives and enjoy a fresher, more natural final product. Whether you’re spooning it onto a baked potato, stirring it into soups, or using it as a base for dips, the ability to adjust the levels of tanginess and consistency makes homemade sour cream an invaluable addition to any culinary repertoire.

One Response
testing